Friday, July 30, 2010

Daniel's Birthday Card

It's my little, cute nephews birthday on Sunday - he's turning 18!!!! lol

Where has the years gone?


Do you think he'll be embarrassed by what I wrote in his card

To my darling little nephew, Daniel
Happy happy Birthday! 18! WOW! I can remember changing your nappy!!!
Love Tania and Charlotte

xxxxxxxxxx<--- lots of smooshy kisses for you!

I got inspired by a card that Paula Dobson made - check out her blog here!

post signature

Friday, July 23, 2010

Kim's Birthday Card 2010

I made this card a few months ago for a friend of a friend, Kim. It was my attempt at a "punk" type of card!!! Not sure if I succeeded, couldnt help but add some pearls! lol
Sorry the photo is not the best.

post signature

Just Add Ink #27 Layout + Faux Metal Tutorial


The following sketch is this weeks Just Add Ink challenge.
I knew, straight away, when I saw this layout what I wanted to do! It was just a matter of doing it - which is so cool cos that normally NEVER happens!


I have used Basic Grey for the actual card and the Faux Metal technique for the squares.

Here's a quick run-down on how I made them:
1. Stamp a piece of card a bit bigger than what you want to end up with, with Versamark.
2. Sprinkle Silver Embossing Powder and heat. (I used tweezers on the outer edge so not to burn fingers - edge will be cut down later on).
3. Wait til cooled and stamp over the top with Versamark again.
4. Sprinkle Silver Embossing Powder and heat.
5. Repeat steps 3 and 4 two more times, so you have 4 layers all up.
6. While the last layer of Embossing Powder is still warm, press into it with your selected stamp.
7. Walah!!! Cut your piece down to the size you want to get a crisp edge.

8. I got the cracked look by putting the piece into the freezer for just a few minutes, and when cooled, I bent the cardstock in several spots and enjoyed the sound of it CRACKING!!

The ribbon is actually Whisper White Taffeta ribbon but as I wanted black ribbon, I used Basic Black ink pad and a Sponge Dauber and rubbed colour into it. I used sewing machine to sew a running stitch along the top edge of the ribbon and pulled and gathered it - not my favourite thing to do - must practise.

post signature


stamps: always, picture this
cardstock: basic grey, basic black
ink: basic black, versamark
whisper white taffeta ribbon, silver embossing powder & heat tool, dimensionals

Wednesday, July 21, 2010

Stupid Men

OK - couldn't resist posting this one!!!! Sorry in advance - not!


hehehehe!
post signature

Tuesday, July 20, 2010

I made it for me?

I made this card for no reason - just felt like it! Maybe I made it for myself - who knows - cos its such a lovely sentiment and I say this to myself all the time anyway!

stamps: razzle dazzle, words of wisdom, great friend
ink: going grey, basic black, pale plum and baja breeze
card: pale plum, whisper white

dimensionals, sponge daubers, little bling things and silver ribbon

post signature

Monday, July 19, 2010

Kitten riding a tortoise!

Anything that can put a smile on my face these days is well worth it! How cute it this!!

Sunday, July 18, 2010

Just Add Ink #26 - Embossing

It's my 1st "off-week" as Design Team at Just Add Ink,
but I couldn't resist a bit of embossing - pardon the pun! I call myself "The Embossing Queen" cos I rarely make a card without embossing something on it! Me and my heat tool are BFF's!!!
- - - - - - - - - - - - - - - - - - - - -
Using the branch from Thoughts & Prayers, I've stamped in Versamark then sprinkled White Embossing Powder and heated. When I had covered the area, I inked a sponge in Certainly Celery, Lavendar Lace and Baja Breeze (individually, of course) and started off softly rubbing the sponge in sections - the ink doesn't stick to the white embossed printing. I kept rubbing in circular motions until I got the look I wanted. I stamped Script background stamp over the top.
The tags are Tiny Tags done in Basic Black with Linen Thread. The card is Baja Breeze and the background mounting is Certainly Celery.
The ribbon is Certainly Celery.
post signature

Friday, July 16, 2010

Condom Advertisement Best Ad Ever Made


Haha so funny...I wonder how many people have ever had this thought cross their mind?

Thursday, July 15, 2010

Filling The Vegetable Garden

Date: Wednesday, 14th June, 2010
Mission: Fill New Vegetable Garden
Materials: 1 x Shovel, 2 x Wheel Barrows and 2 Cubic Metres of Dirt (aka a sh*t load of dirt)
Workers: Tania and Dad (Peter)
Conditions: Fine with 10minutes of rain, muddy, sloshy and muddy (thanks to the last week of rain)

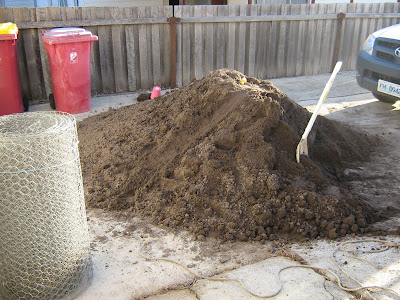
It all started with a pile of dirt.


Starting to fill - by this stage (which was only about 3 minutes into it) I was really doubting whether it was humanly possible to wheel THAT much dirt!


Dad was trying to convince me the pile WAS going down. Hmm....


Slippery, sloppy, sloshy and ICK!! Maybe I should mention here that we had to wheel the barrows of dirt up a sloping concrete area - uphill on the way full, downhill on the way back empty - typical!

Will my backyard ever be the same again?


It's almost getting dark and I THINK I can see the light at the end of the tunnel... I think

It was too dark last night when we did actually finish, but never fear, I was out there this morning taking "PROOF" pictures - to PROVE we did do it!!!!

TA DA!!!!!!
It's finished - with bonus Shetland Poo on top (thanks dad for doing that bit - stinkeeeeee!)

Foreman (forewoman) Molly.

Now this isn't a new home being built and its not major renovation either, but I have ALWAYS wanted a built-up vegetable garden and chickens in the backyard, so I'm sooooo super excited to see it finally happening! So can't wait to see healthy vegies growing and happy chickens - will definitly take pics as it starts to change again! Hope you enjoyed seeing my Wednesday!

post signature

Monday, July 12, 2010

A Mirror, Cupcakes and a Woodheater

Yesterday - I finally got this up...
...the MIRROR!!! (Thanks dad!) I've had a small round mirror for the last 6mths and have had to bend over to see my face (erk!) and to put on make-up and do hair etc and I'm so so so excited to get the proper real one up!!!! Had to take it back to the glass supplier as it got a chipped corner, got an inch or so cut off the top and in the end it worked out well, and I'm soooooooooooo stoked!!!! But who knew that I had so many wrinkles and so many grey hairs!!!

AND...two very exciting things happened today as well!
#1...I managed to successfully turn out some cupcakes!!!!! Generally, any cake I try and make is a major disaster, but not today!! WOO HOO!!!

and #2....I have my woodheater back! After a few issues and a chance of not having wood heating, its back!!!! And I'm soooooooooooooo excited!!! Electric heating sucks after having wood heating for the last few years
(thanks again Dad!) Thanks to my wonderful dad for coming to my rescue. What would I do without him? And yes, he did get a cupcake!

Small things make me excited! A Mirror, Cupcakes and A Woodheater!

post signature

Saturday, July 10, 2010

Welcome Frankie!


Meet my beautiful friend Sarah (on the left - the blondie!)...this is us in Melbourne last October. Sarah arranged for me, my friend Kobi and herself to have a girls w'end in Melbourne for my 31st Birthday. Sarah was so so SO damn generous and I will never EVER forget those 3 days! She is such a blessing in so many ways and I'm so proud to be her friend.
Now,
I'm so super-excited (and clucky!)....because she
gave birth to a gorgeous little girl last night (Friday) after a delightful 26hr labour AND we got to go meet the precious little poppet today! Welcome little Frankie AnnaLyn - weighing in at 8lbs 10oz! Here is my 4.5yr old daughter, Charlotte, having a little hold. (& I have no idea why her little cheeks look like she's had steel implants in them!) Oh how wonderful newborn babies are - and what an amazing miracle they are too! I was waiting til I knew the sex before I made Sarah and hubbie Sam a card....so I was up out of bed early this morning and straight into it! I saw this card a while back and was inspired - so here it is.... PS...did I mention I'm really clucky? ;)
post signature

Friday, July 9, 2010

Just Add Ink #25


This week's Just Add Ink Challenge is........
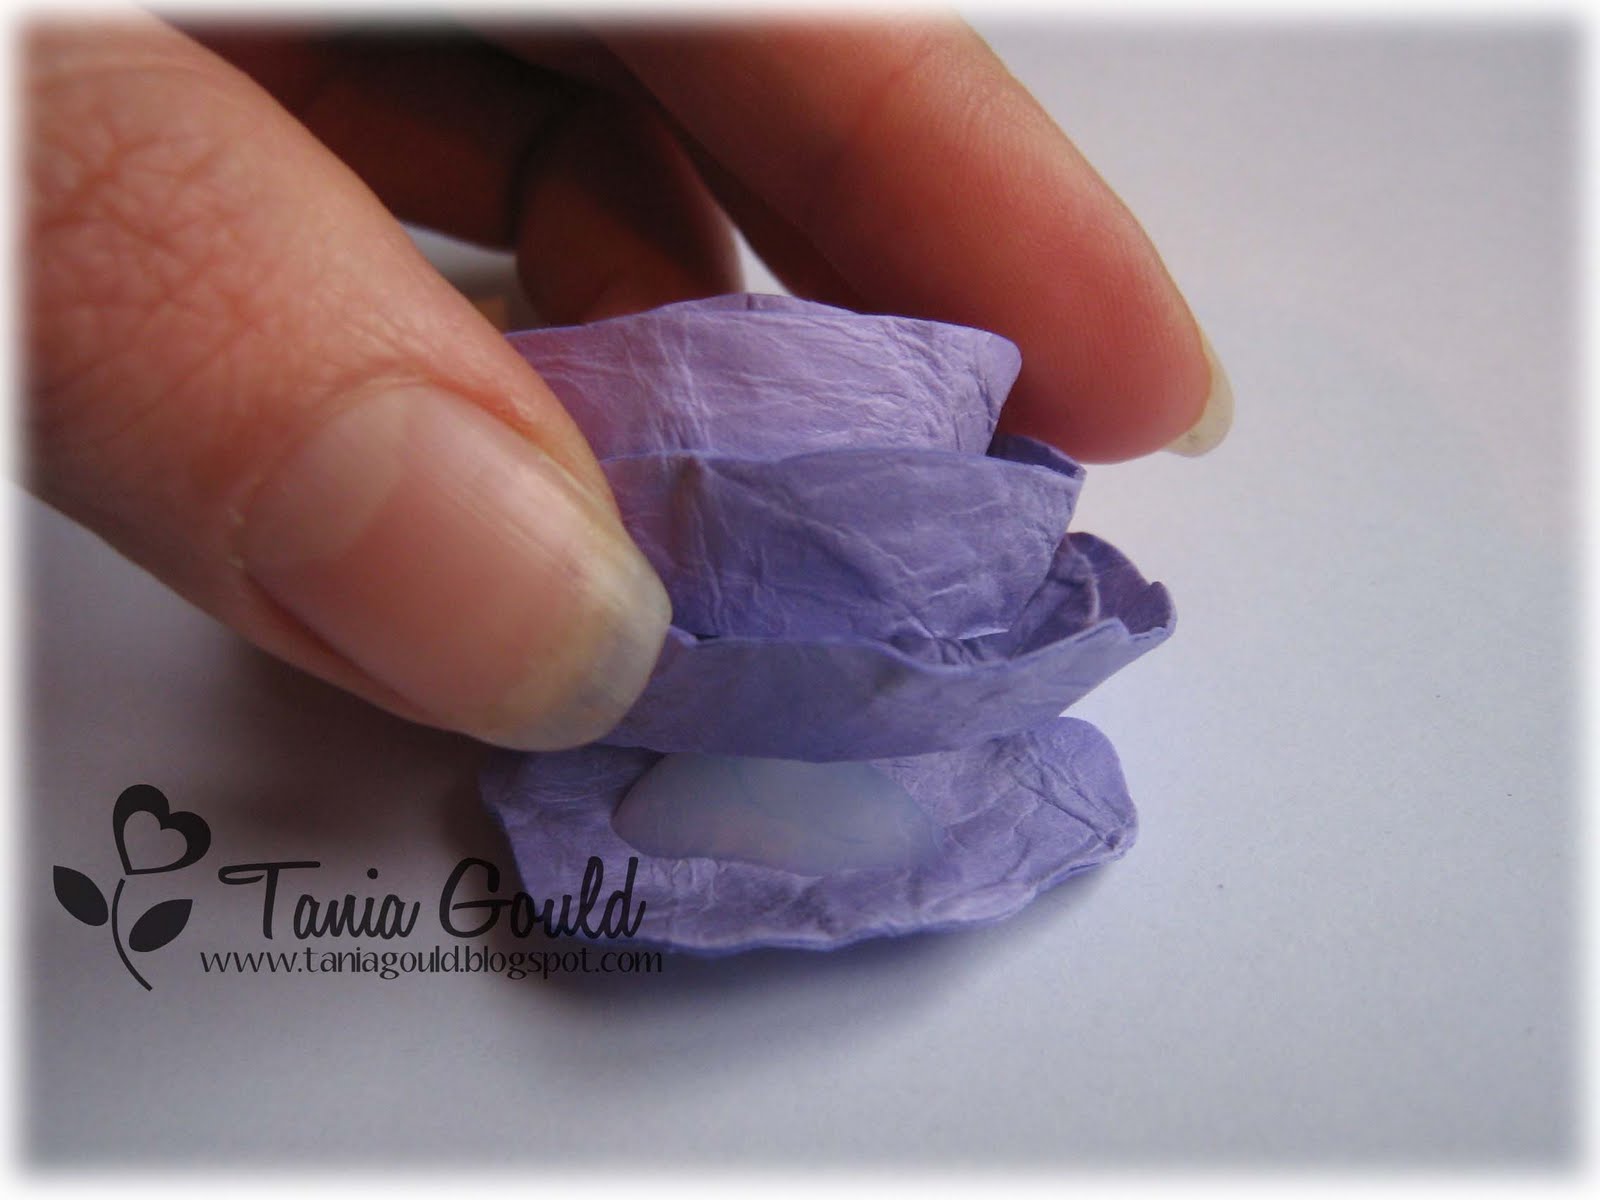
Now I love pinks and purples, but this Colour Challenge was a tricky one for me. I ended up being inspired from a couple of cards and sorta joined them all in together.
Yes, I did spill the Chunky Sprinkles on purpose - not sure why, but I did!

The Soft Suede strip has the effect "Cracked Glass".....I coated that strip with versamark, then covered it in clear embossing powder, and while it was still hot, I poured more embossing powder on it and repeated a few more times. When I had it nice and thick, I popped it into the freezer for just a few minutes, and then got it back out again and bent it slightly to "crack" the embossing. I also rubbed some soft suede ink into the "cracks" so they weren't too white and fresh looking. Check out a Splitcoast Stampers tutorial here.

Anyways, hope you like!!!!

post signature


cardstock: rose red, whisper white (woopsy), soft suede and elegant eggplant
stamps: wonderful favourites, tiny tags, vintage vogue, thoughts & prayers
crystal effects, chunky sprinkles, extra-large two-step bird punch (for leaves), versa mark, clear embossing powder, eyelet border

Thursday, July 8, 2010

Rolled Rose Tutorial


How To Make A Gorgeous Rose
by Tania Gould

STEP 1: Start with a square. Here, I used 3"x3".


STEP 2: I like to cut the corners off my square rather than work with a perfect round circle - but both produce beautiful flowers so have a go at both!


STEP 3: Crumple it into a ball. Unfold and crumple again. This softens the fibres and makes it soft and "loved"! I really give mine a good going-over, screw it up and roll it in my palms. The rougher the better! But make sure you dont tear it, of course!


STEP 4: Next, cut a spiral shape starting at the edge and working your way into the centre. I like to cut a bit wonky on purpose, because it then gives shape and definition to the petals. Leave a bigger (wider) area in the middle as this will be the base of your flower where you can adhere to.


STEP 5: Start rolling it up from the outside (where you first cut into). The tighter the first part is, the more tighter the "bud" of the flower will look. Keep rolling until the end.


STEP 6: Once rolled up, gently let it go and it will "unravel" itself a bit so it looks more natural. You can fiddle with it to get it how you like. I even trim with scissors some of the petals if they are a bit wide in places.
I like to adhere the rose at the base by using Stampin' Up Crystal Effects. Squirt a generous blob on top of the base and under the rose and hold for a few seconds and then leave until it is thoroughly set. You will then have your beautiful rose!

I have used this rose on my Twilight-inspired card here. Let me know what you think of my very 1st Tutorial and I would LOVE to see any future roses you make!
post signature

Mothers Day 2010

Ok - a tad little late - but here is my mums 2010 Mothers Day card!!!! I was a terrible daughter and woke up on the day and realised I hadn't even made her a card!!! And I remember that morning distinctly (actually 2 days before but I was seeing her on the Friday) because it was the day of Agfest (Tasmanian Rural/Agriculture show/display) and it was absolutely pouring and wild wild winds were rattling my craft room windows. 5am. Cold. Dark. But this card appeared an hour later!!!
I followed Julie Buhler's fab
tutorial for the flower and found a brad in my box that suited for centre.

cardstock: lavender lace, melon mambo, whisper white
sorry dont remember the cuttlebug embossing folder name, pink organza ribbon and pearl buckle thingy and a random brad!!! helpful I know!


post signature

Wednesday, July 7, 2010

Just Add Ink #25 Sneaky Peaky


Just a little sneaky peaky at this weeks JUST ADD INK challenge........go to JAI this Friday to find out what it will be!
post signature

Friday, July 2, 2010

Just Add Ink #24 - Layout - Twilight Inspired

WOWEE!!!
Changes at Just Add Ink! We now have some exciting news!! NEW TEAM MEMBERS! Not one, not two but EIGHT new members!!!! If you haven't already, go congratulate them on this really exciting new adventure they are about to start! You will find their blogs and details at Just Add Ink.

The layout this week gave me mixed feelings...one minute I'm thinking "easy-peasy" then next I'm thinking "Uh-oh".....I had a great idea for 2 weeks and when I attempted to create it I had so much trouble and gave up (well put it in the too-hard-basket for now!).

I decided I haven't used my beloved Baroque for a while, so dusted him off and brought him back into the daylight. Oh how I love you Baroque Motifs!

Below is a close up of the rose AND I have exciting news of my own, I managed to spend a whole day working on my very 1st Tutorial (of the rose) and would love it if you could check it out
here and the come back and tell me what you think of it!

post signature

stamps: baroque motits, best yet, en francais (thanks Bronwyn!)
ink: night of navy, basic gray, rich razzleberry
cardstock: night of navy, baja breeze, rich razzleberry
crystal effects, dazzling diamonds, sponge daubers, glossy white, sizzlits die - tiny leaves
Related Posts Plugin for WordPress, Blogger...